Post Processing an Image. What’s in YOUR Workflow? Part 2.
In my last post, (Part 1), I reflected upon a lot of my thoughts and observations about Image Post-Processing and the use of the various methods that we as photographers have at our disposal to alter, shape and enhance our captures.
Purposely, I stopped short of naming some of the Apps and programs I use because I (partially) didn’t desire those applications to be the focus of that earlier post.
There are as many different photography software programs out there today as there are photographers. The reasons as to what programs/apps a photographer chooses to use are very personal and above my paygrade to count or quantify. This is a very subjective photography subject and this post in no way signifies or tries to convince that one application or program is better than the next. These are just the few that I use and have become the most comfortable with.
Call it Art, Techno Geek or an extension of Photographic Style, there are literally hundreds of very successful YouTube channels devoted to the “work” and many dozens of outstanding experts in the field. Some of which I have studied under personally and others with whom I’d like to. Photography itself has given rise to a whole other industry that is mind-boggling if you stop and think about it.
With this post, the second of two that I have published on the topic, I’ll expand on the methods and programs that I currently use and how some of those individual features were used in a sample photograph that I posted in a Facebook Image Post-Processing software group’s page.
The first post (Part 1) that I made on the subject is more of an excursion into the idea of Post-Processing and how there are some very strong opinions about the practice. If you’ve not read the first post, and would like to, you may find it here: Thinking Out Loud About the Photographic Image Process
This post will deal more with the technical part of the practice, specifically, my workflow on a certain image and is decidedly more technical. (and geeky)
To continue, the backstory is, is that I received a request in a Facebook Photo Group comment to see the original image as well as an inquiry about the workflow that I used to arrive at the finished photo.
That request gave me the idea for both postings and is a subject that I considered to be worth writing about.
I’ll refrain from discussing the use of Artificial Intelligence (AI) (beyond the purpose of “masking”) today as it is certainly a big enough topic to merit it’s own post in the future. The improved masking features of all the new software makes image processing impossible to discuss without at least a mention of the role that AI now plays in everyday photography post-processing work.
AI has now become almost the industry standard especially when it comes to making precise selections of objects in our images that need or that we require for adjustment.
AI has been a huge game-changer particularly in the learning curve of sophisticated programs like Adobe Photoshop and the amount of time we spend painstakingly to create our art and adjust each photograph as a memory of the scene we think we initially observed through the viewfinder or display on the back of our chosen camera. The masking features that AI possesses go far beyond of what we had just a year ago. The ability to accurately isolate, adjust and manipulate certain and precise areas of our images are now within any photographer’s reach.
Indeed, we have now added yet another hat to our repertoire of what it takes to be a modern photographer. That being of what I refer to as a “Digital Image Photo Artist.”
More specifically, I believe that now, more than ever before and if we choose to do so, we have the opportunity to create art in our own way and with a vision that is entirely ours.
Can you fathom the idea that merely a few years ago, informing a photographer about the capability to regulate the ambiance of an environment beyond the camera lens and post-capture would have been met with skepticism? Moreover, being able to not only establish their desired mood in a photograph but also generate additional virtual images of it while experimenting with various other atmospheres at will? Unbelievable.
Without further comment, I’ll get to the purpose of this post and start dissecting a photo of mine so that you can witness my process first hand.
Please keep in mind that this was the process for this image only. Some parts of the process are always the same and always occur in a certain sequence. I have pointed these out in my explanation.
Getting to it…
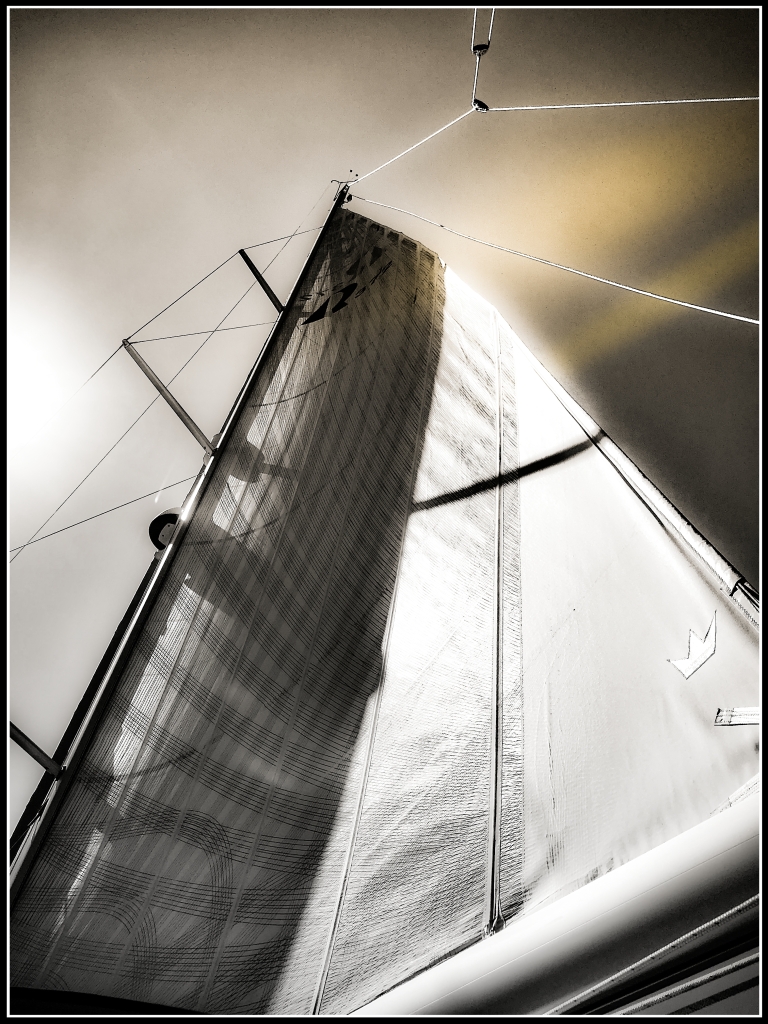
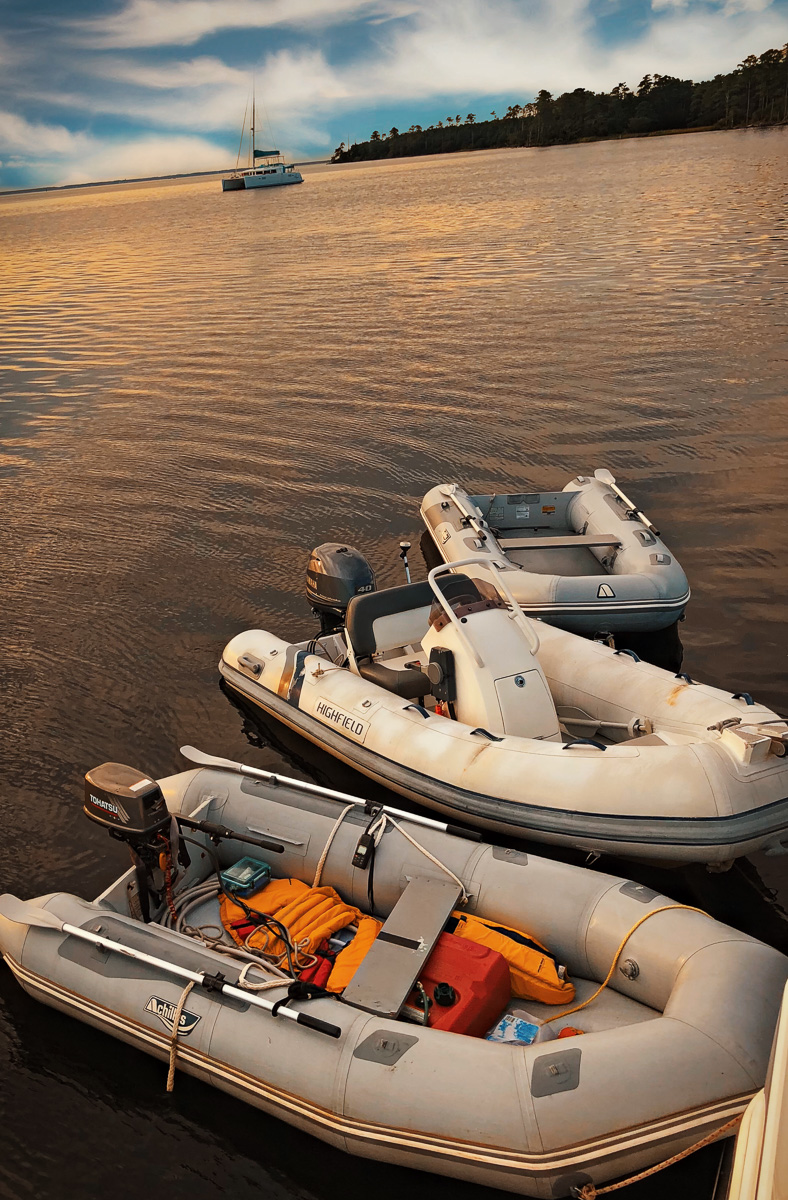
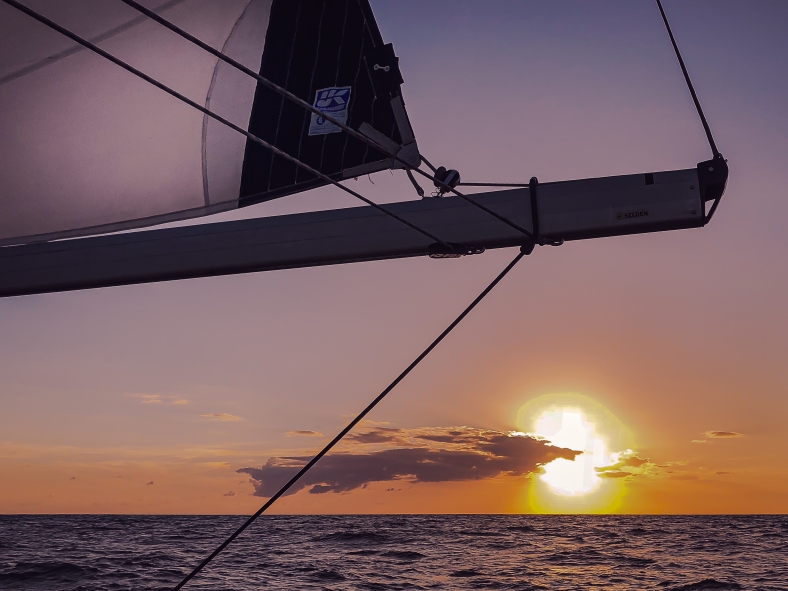
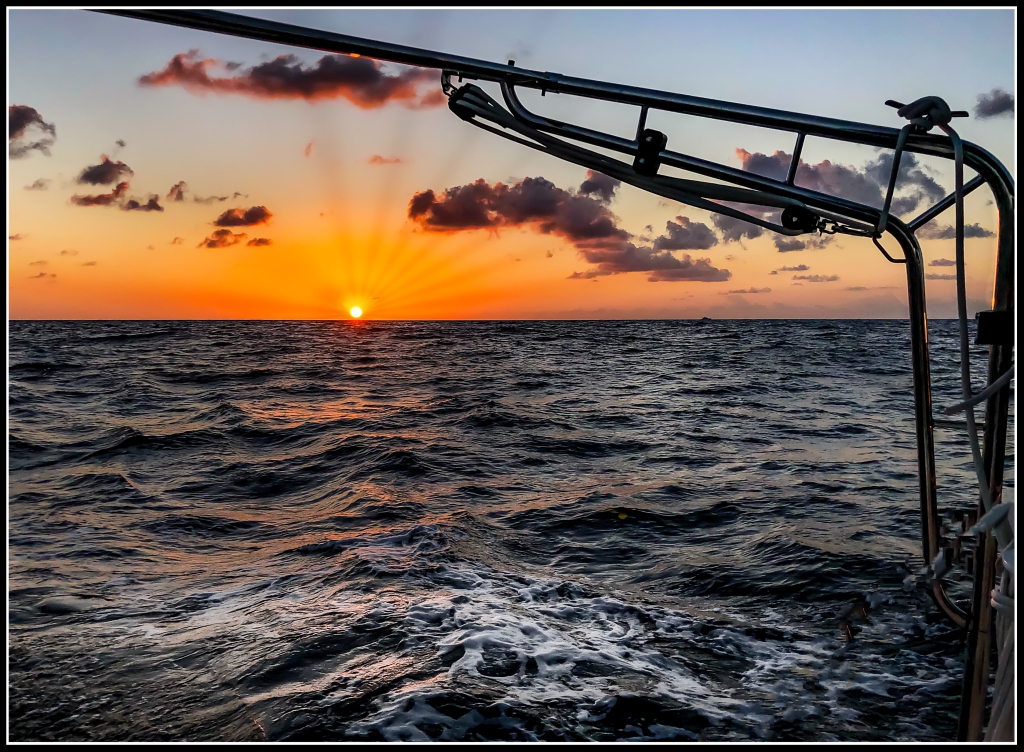
Below, you will see two photographs. They are actually the same file (and the same photo) but the paragraphs below describe my post-processing workflow that was used to produce the final image. I have tried to keep the 2 files together in the post so as to make it easier for you to follow along and reference the changes.

Canon G12 Point & Shoot. Manual Mode, 1/250 @f2.8, 6.1 mm, ISO200
Originally, the photo was captured using a Canon G12 Point and Shoot with a photo file type setting of “RAW”. Shown here on the left. My G12 is an old camera. It was purchased new in 2010 and only has a 10mp sensor, which is less than any 4 or 5 yr. old smartphone
From the G12’s SD Card, it was then transferred into Adobe LR Classic, my “go to” desktop application for most of my image basic processing.
A Few Words About Black & White
I will mention here that when capturing an image in Black & White and with my Sony A9 mirrorless DSLR, I have recently (and on the advice of a photo software guy that I follow on YouTube), started capturing images in the “Raw + Jpeg” mode. I’m doing this to provide me of a more accurate review process of the image while still in the camera. To do this, it is necessary to have a camera that will shoot in the Raw + Jpeg mode, essentially producing two files for each photograph. One in B & W (the jpeg) and the other in color (.ARW – this is Sony’s proprietary RAW file format) which is the format that the camera actually sees and records the image. It will “see” in Black & White using the .jpeg format if you direct the camera to do this in the menu. Using this method allows more latitude of light and shadows than just simply converting a color image to B & W in post-process. Most modern DSLR’s have this capability of shooting in a dual file format.
The Apple iPhone 13 Pro that I use as a smartphone does not have the capability to do this multiple file capture in one shot. It does have the capability of capturing in the “Apple ProRAW format that uses the .DNG (Digital Negative) file format ( which is “sort of” a universal file format for RAW captures). This provides additional flexibility when editing exposure and white balance. Obtaining in image in the B & W mode is possible only because of the ability to de-saturate the image after you capture it in the .dng, .jpeg or HEIF formats. This is done in the “edit” menu in the native “Photos” app. The phone does not have a B & W option for either of these 3 formats. So, in reality, it’s not a true Black & White capture. Something to keep in mind is that the files are large, approximately 25 mb.
I believe a better alternative if using a mobile device is to download the free version of the Lightroom Mobile Application and this is what my choice is.
From the Apple Play Store. The app is simply entitled “Lightroom Photo & Video Editor”. Operating your camera from inside this App gives you much more in the way of choices and this is where you will find the options to capture B & W images during their original captures. You are only offered 2 choices but at least you have the option.

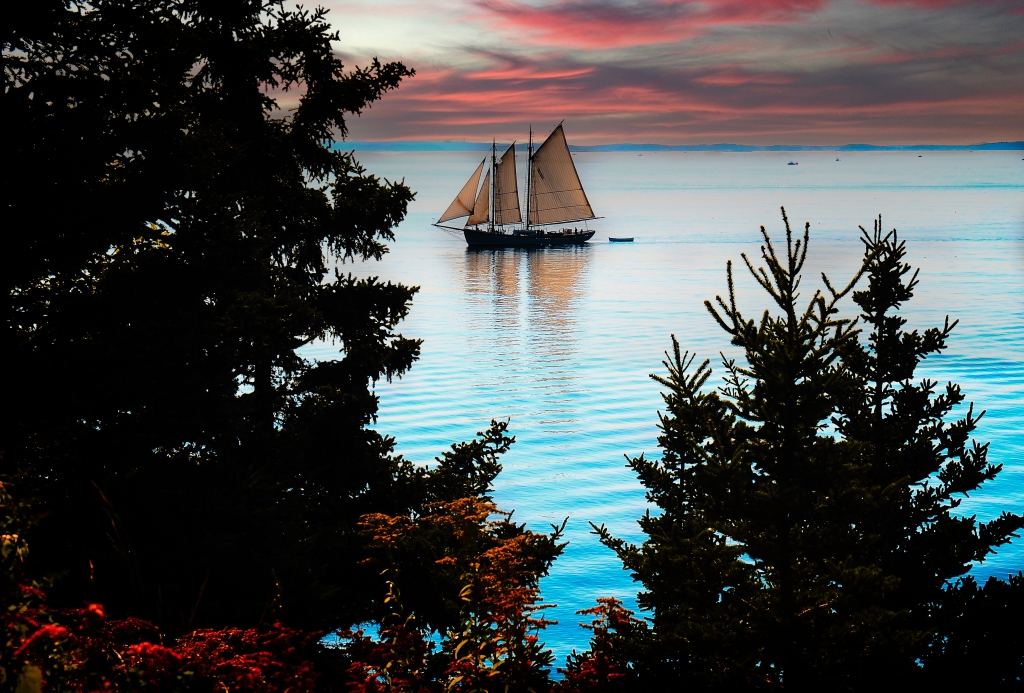
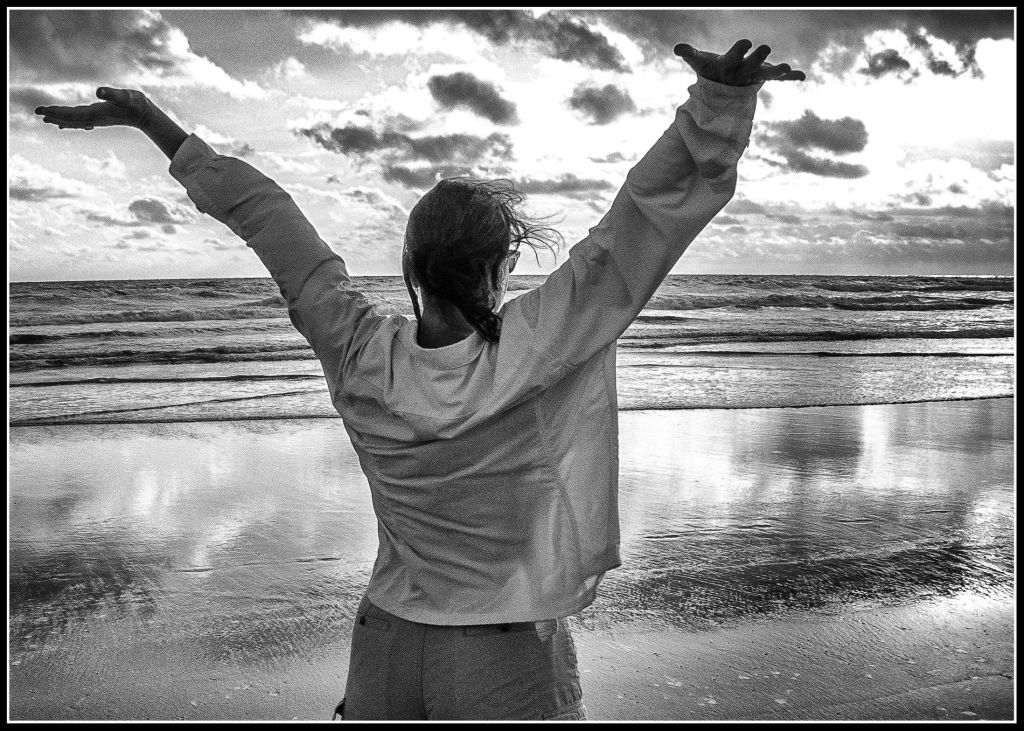
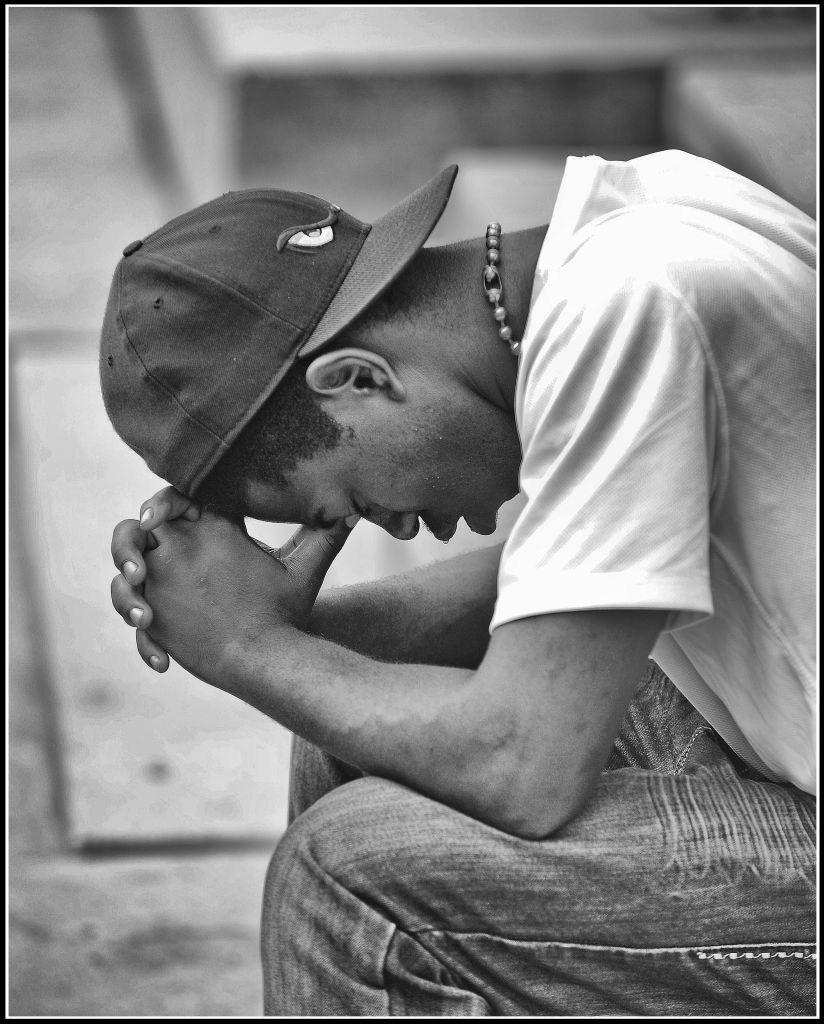
“Swab”
Apple iPhone 13 Pro. 1/320 f/1.5, ISO200 August 2023
Using Lightroom Mobile App for capture in High Contrast Mode.
Enhanced with Lightroom’s DeNoise feature Only. No other adjustments.
If I feel that a Black & White or a Color image is a candidate for conversion to Black & White, I will normally always use the adjustment options and incredible presets that are offered for Black & White in On1’s 2023 Photo Raw. I convert many of my color captures into Black & White and started doing this when photographing in the dead of Winter when everything was just brown. Now, I look forward to photographing in Winter and refer to it as “Black & White Season”.
Thinking of it this way has opened up many possibilities.
You’ll have much more Device camera control over the capturing process using Lightroom for a mobile camera App. With this App, as I pointed out above, you’ll be able to capture in 2 different B & W modes from the outset and there is no need of multiple files as there is in a DSLR. I mention this because the use of cellphone cameras is now very widespread. Plus it’s the camera most folks will always have along with them.
I have discovered an additional cutting-edge feature in the latest image processing software that allows for high-quality and functional imaging results with smartphones and point-and-shoot cameras utilizing smaller, more electronically turbulent chipsets. The ability to capture images in RAW format is essential for exploiting this capability, but it is undoubtedly a worthwhile investment. I will delve into further detail on this exciting development in subsequent paragraphs, so please continue reading.
While some photos never make it past the mobile app, the photos that I see potential for are then synced with Adobe LR Classic for further development on my desktop. The interface between Lightroom Mobile and LR Classic is seamless which makes it easy to get mobile camera images into your desktop, laptop or Tablet.
I felt that this backstory is relevant which is why I included it. It sets the stage for the sequence of adjustments used to arrive at the final result.
What follows is my workflow for this image only unless specified differently. I normally do follow a certain sequence but the post-process always starts first in my camera.
Next, what follows is the import (upload) process where lens, camera and other metadata information is automatically applied as a “preset”.
Afterwards and on my desktop, the workflow will frequently change according to the look or style I’m ultimately after. These different “looks” and styles have taken many years of practice to get to the level that they are today.
Through the years, attending workshops to study one-on-one with professional photographers whose work I’ve admired and constant study of other photographer’s work in magazines, exhibitions and online has gone a long way towards helping me to develop my own processing style.
I should also mention that there is another advantage that I really love about the image processing tools we now have available to us. Those tools enable us to impart our very own visions of recalling a scene as we “saw” it in our minds. If you look at images online, everyone has a different idea of the way we individually think of how an image should be processed. As you can imagine, this has resulted in an unlimited storehouse of interpretations and visions spread across communities and in reality, the entire world.
The online version of Adobe Lightroom even offers a “Discover” feature that you can go into and choose to “remix” or process someone else’s photo in your own way!
It’s really fun to see what other accomplished digital artists can do with your photo and you with theirs.
Of course, it’s your choice to participate but it’s actually very interesting to see how others choose to treat an image.
As a sidenote to this, from many years ago, it seems like I remember studying a photographic process that taught the practice of “pre-visualizing” our desired results before recording an image. Perhaps this technique has become so ingrained in my image capturing process that I subconsciously refer to doing it each time I frame up an image. This is one way the post-process begins in my camera.
This acknowledgement can and does support my statement made above about recalling the images we “saw” in our minds.
The results of our image processing efforts are as individual as we are And very interesting (at least to me) as studies into many photographic styles. It is amazing after a time, or years of image processing practice and experience, that we can look back and plainly “see” the styles we have developed as image takers and makers. Many questions arise and revealments (I made that word up) come to light as one thinks more deeply about this. Indeed it would make an interesting topic for further posts and discussions.
Ok. So What About The Workflow for This Photograph?
Capturing a photo in a camera’s proprietary RAW format enables the use of LR’s (Adobe Lightroom) Denoise Enhancement feature which in my experience, helps greatly with small device captures. Especially in lower light/higher electronic “noise” situations. On1 offers their version of a noise reducing feature which goes by the name of “NoNoise AI”. You’ll have to do your own research here as to which algorithm works best for you because I’ve discovered that there are many individual factors that come into play on different proprietary file types using different algorithms, chipsets, Cameras, lenses and Computer equipment.
The bottom line on this is that you’ll just have to experiment and use the version and adjustments that gives you the results you’re looking for or like the best. The results DO vary widely and you will find that this part of the workflow on EVERY image is gonna be different. A lot of my work is done using a Sony A9 and because of Sony’s excellent chip sets, I’ve never really felt a strong need to use any of the noise reduction features that often.
My philosophy about using as few adjustments as possible to get my desired results are similar to an early lesson I learned about composition and that is that less is always better.
When I stopped trying to include everything that appeared in the frame of my viewfinder, my work got substantially better. (I still have to consciously remind myself of the KISS method when composing an image).
Because of years-ago technology (or the lack thereof) embedded in my In-camera workflow, I’m kinda “old school” when it comes to using as low an ISO as possible.
“Tack Sharp and No Grain” has always been the aim of my camera game.
I suppose that mantra was driven home to me back when the image capturing process and equipment was much less technologically advanced (and affordable) than it is today.
It has taken me a little while to start using the noise reduction feature simply because with the incredible resolution of the mirrorless Sony A9 and together with my habit of never using an elevated ISO, I didn’t feel as if it was really necessary.
It remains another story with mobile devices and the smaller chip cameras. Nevertheless, with some of the improvements in Smartphone Cameras and especially the latest Denoise features of new processing software, I find myself turning more and more toward my pocket for those quick and unplanned captures that catch my eye. Especially if I’m just out and about without my A9.
Later, the out-of-camera process begins as I sit down and review what I’ve captured, I start out by filtering out unwanted or low potential images. For various reasons, I’m pretty brutal when it comes to culling out the “unwanteds” but I’m still surprised sometimes at the number that seem to make it to the “Post stage”.
After this exercise in “cleaning house”, I’ve disciplined myself to assign keywords and catalog every single image according to (top folder) date first, (Year, Month, Day) and sub-folders (event). I will additionally assign photos to individual “collections” (in LR) to group them according to what I intend to eventually use them for. I may have a collection for a specific wedding, photo shoot or calendar. These collections are many in number and can actually be for any reason that I dream up. Not every photo will make it’s way into a collection but overall, it is essential to have at least one way to recall any photograph at any time and is especially important when your catalog consists of over 50k images.
A New Solution for “Noisy” images that REALLY works!
At this juncture, it is worth noting that since their introduction, I am increasingly relying on the noise reduction functionalities mentioned above. I normally perform this Denoise procedure early in my development workflow and have found that they are a complete game-changer when it comes to the amount of usable images I am getting from my iPhone and very old but reliable Canon G12 Point & Shoot. The Denoise feature in LR and the “Noise AI” feature in On1 have become a major leap in turning the captures made with these smaller chip devices into “keepable” photo editing successes.
Electronic “noise” is a ugly byproduct of small chips in small devices such as cheap, Point & Shoot cameras or Smartphones. Especially in Low Light situations. Heat is also a source of digital noise and an enemy of a digital image. Cell phones are known for getting hot and trying to shut down. Finally, the very high ISO that these cameras are forced to operate at induce noise at a voluminous rate.
The DeNoise algorithms that are available now in the new software’s have greatly reduced the noise problem and provided a lot more image recovery.
I’m not a “pixel peeper”. But if you’ve ever seen an image on anything larger than a smartphone screen, you’ll know of what I speak of. When viewing these images, try zooming way in on any smartphone photo captured during low light or whose optics were”zoomed” to get the shot. It’s an ugly mess.
Next, some basic adjustments are made, primarily, slight cropping and very small adjustments of clarity and dehaze. In certain situations, Dehaze helps me to enhance colors in a more natural way than using vibrance or saturation. Used together with exposure, highlight and shadow adjustments, it seems to give me the results that I seek and helps me to avoid the “over-processed” look that I dislike.
A footnote here. Perhaps it is because I’ve been a LR user since the original Beta 3 version was made available for Windows back in 2006 that I find Adobe Camera Raw easier to get the basic developing results I want out of an image. I do enjoy using LR’s new masking features and sometimes this is where the process might end depending on the final result I’m after. But usually, and depending on final use of the image, this is where the export process into On1 or Photoshop begins. I did not leave out the “Curves” adjustments here. I just did not use it for this image.
At this point, the real fun starts and the creative process takes a front seat.
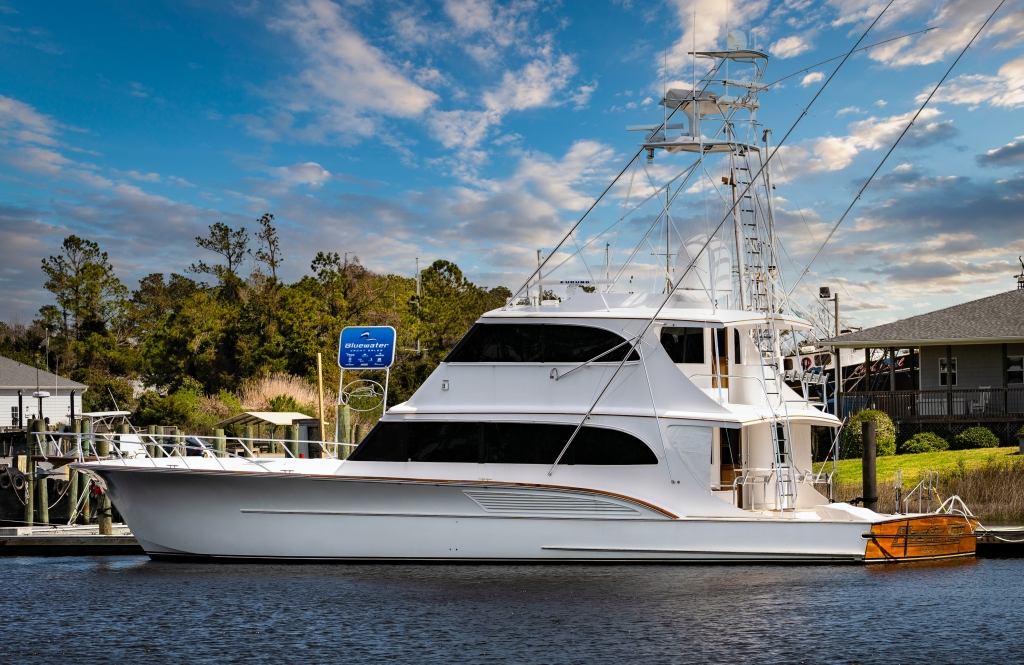
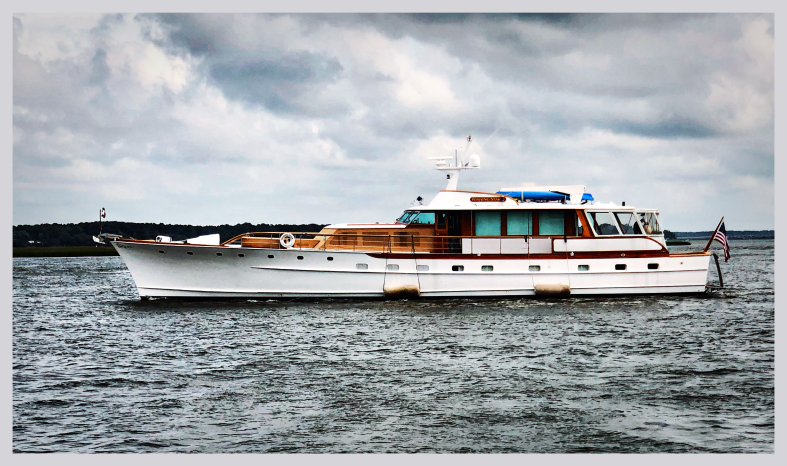
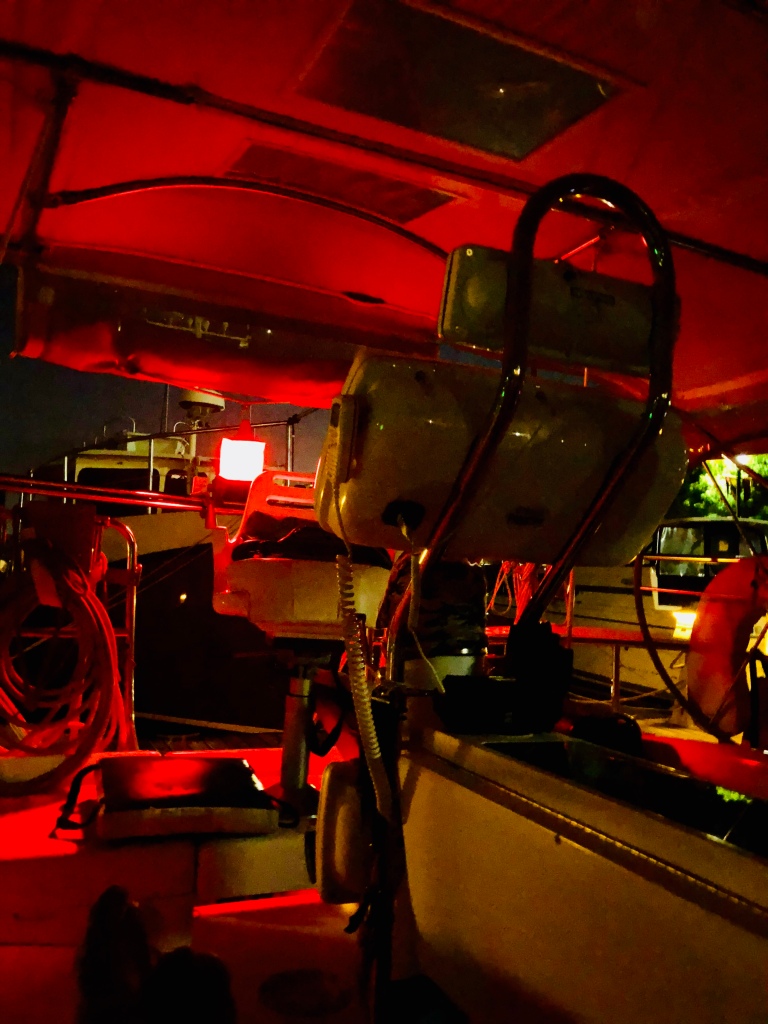
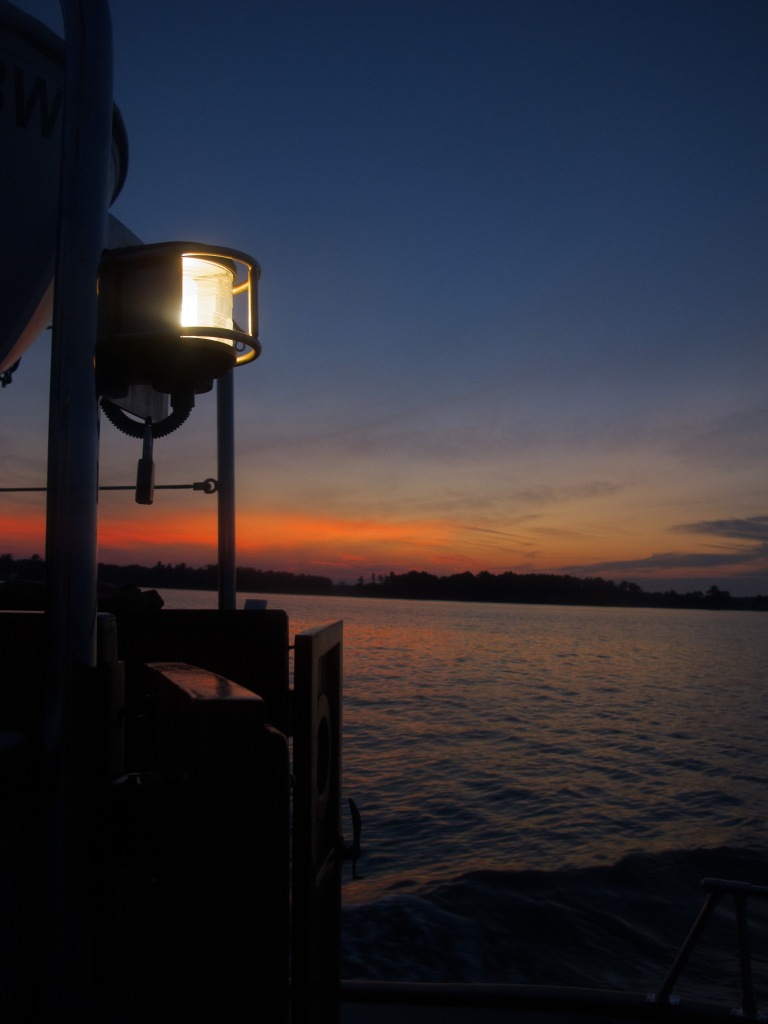
Once into ON1, and for this photo, I started out by using a local adjustment. I made use of On1’s excellent AI masking features to “dodge” (lighten) the exposure on the surrounding structure of the boat’s cabin top and also in the background sunset light on the water.
Since a lot of my work is done with waterscapes, it’s become critical to me that water reflects the correct texture, tone and color in each of my photos. This is different for every image and is often dictated by the “mood” of the photograph.
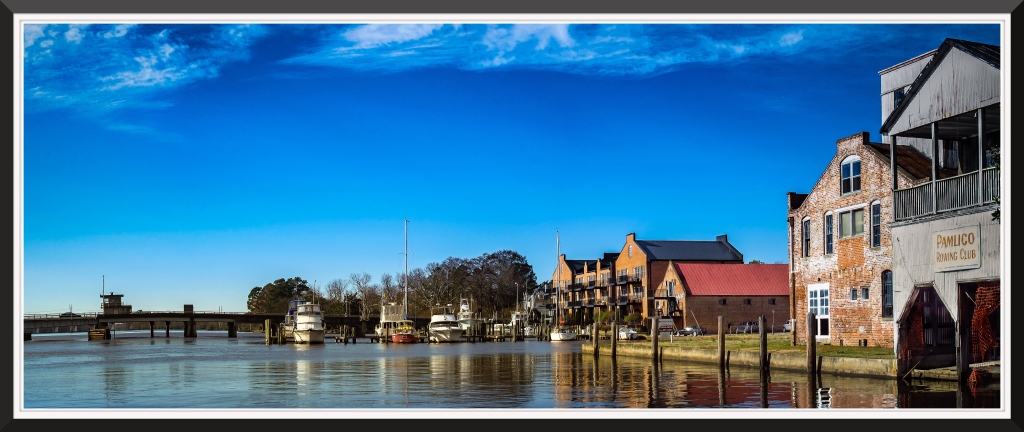
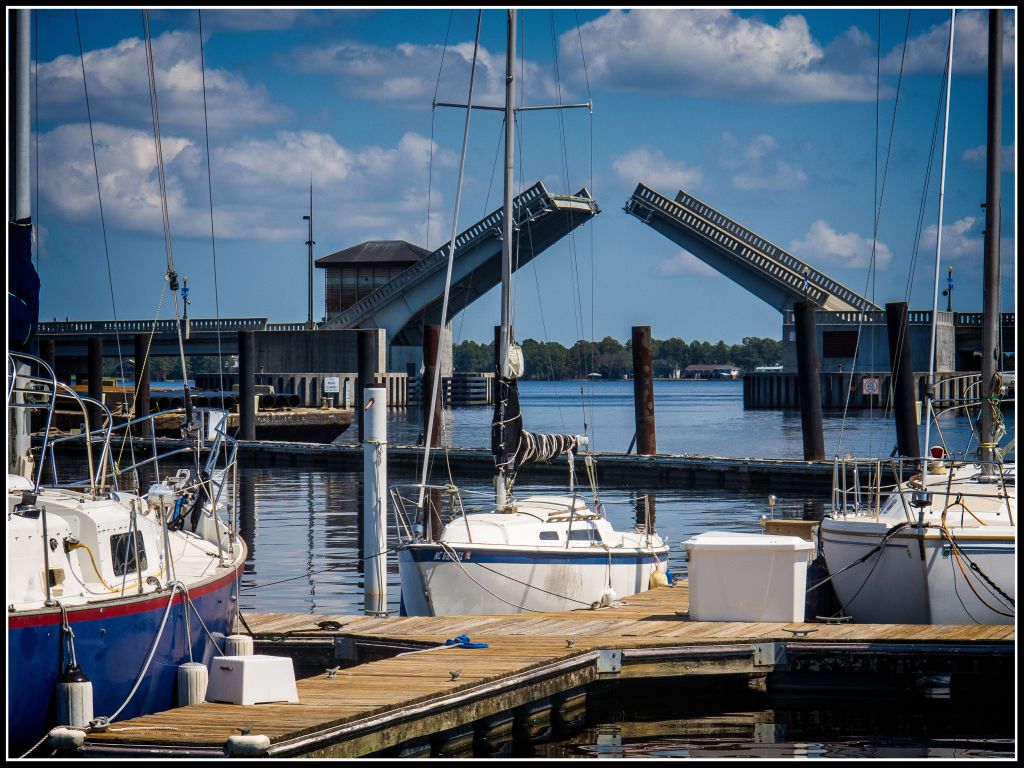
Here’s an example of what I mean by “mood” that you can see from this image of New York Harbor.

Lower East Side Manhattan and the Staten Island Ferry Terminal. August 2020.
Canon G12 1/800 @f5.6, 61mm ISO100
Image processed in Adobe Photoshop Lightroom Classic and On1 Photo Raw 2022
Continuing,
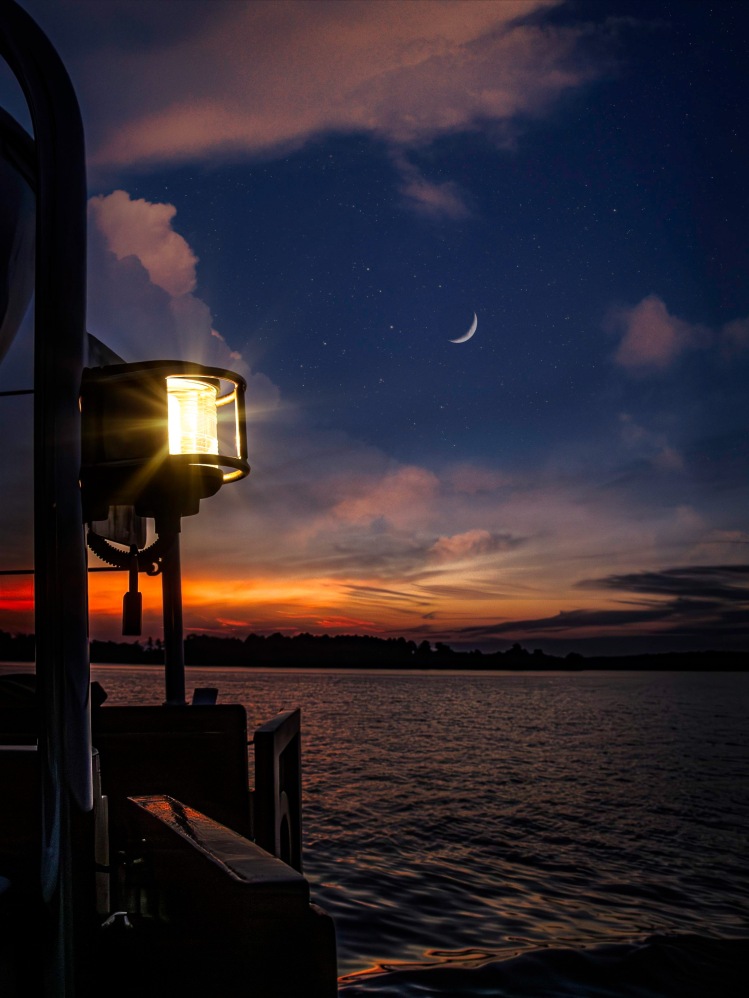
The luminance for the stern light was warmed by adjusting it’s color temperature and “rays” were added and adjusted using On1 Effects “Sunflare” > “Sunstar” and appropriate “texture”.
“Transform” and local adjustments were used here as well to move, “paint out” and “paint in” certain details of the sunstar to make it look more natural.
The same result can be accomplished in Photoshop by using some of the “special purpose” brushes.
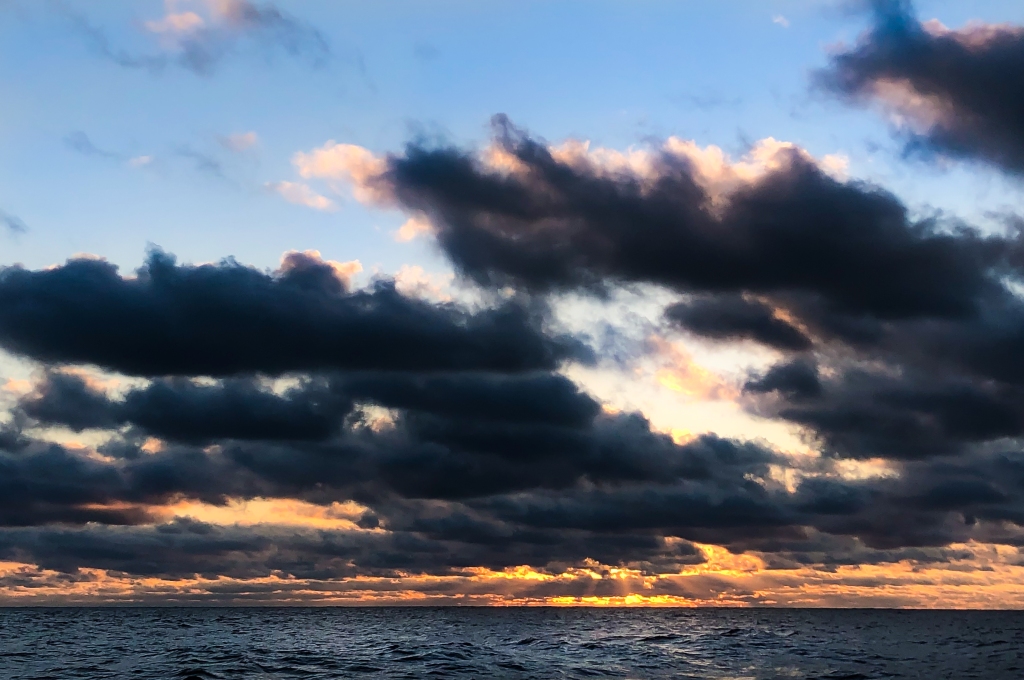
Next in line was the sky, which was added from On1’s extensive sky replacement selection. After trying many of the available “Night Skies”, I eventually settled on Night Sky #4 for my replacement. This sky most closely matched the color and light of the existing sky and the upper clouds and moon were a nice bonus. The sunset and colors in the photo are all original and were what drew me to the shot in the first place so I wanted to preserve as much of that as I could.
After that, It was a simple matter to use the adjustments provided in the sky module to fade, adjust and manipulate the sky to just the right position that also incorporated elements of the existing sky’s lower portions. To finish off, color temps and feathering were used to “blend” the two skies more naturally at their intersection.
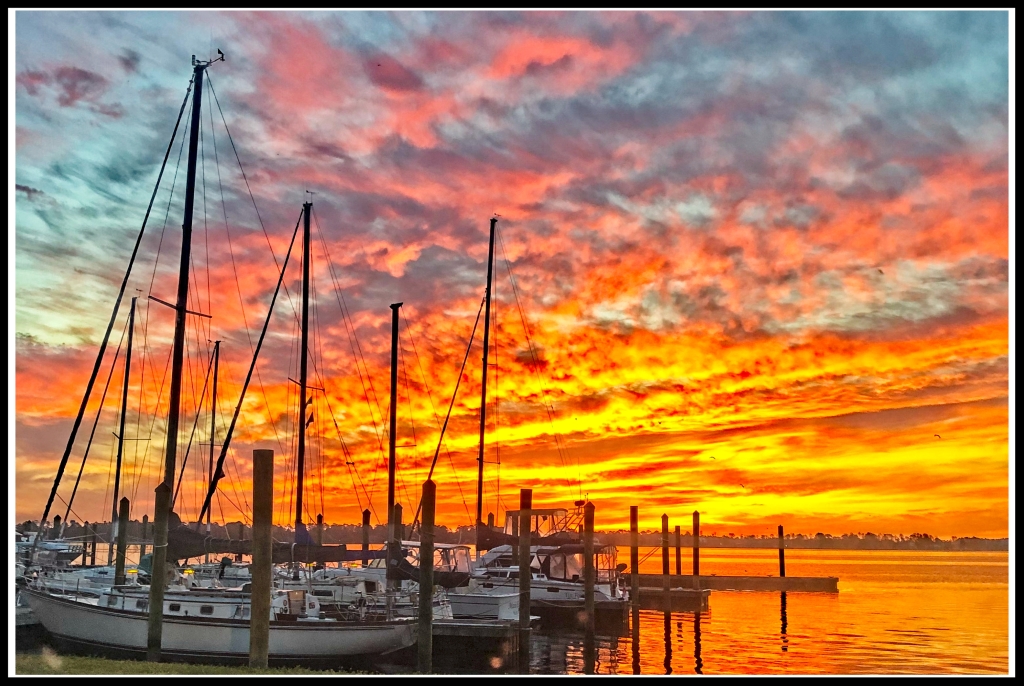
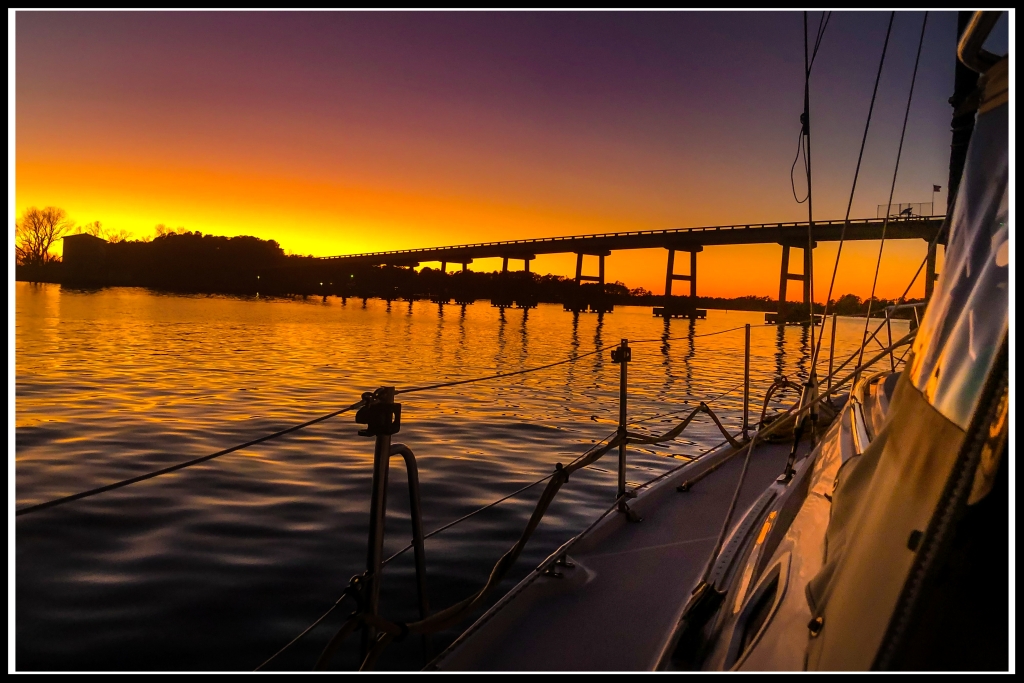
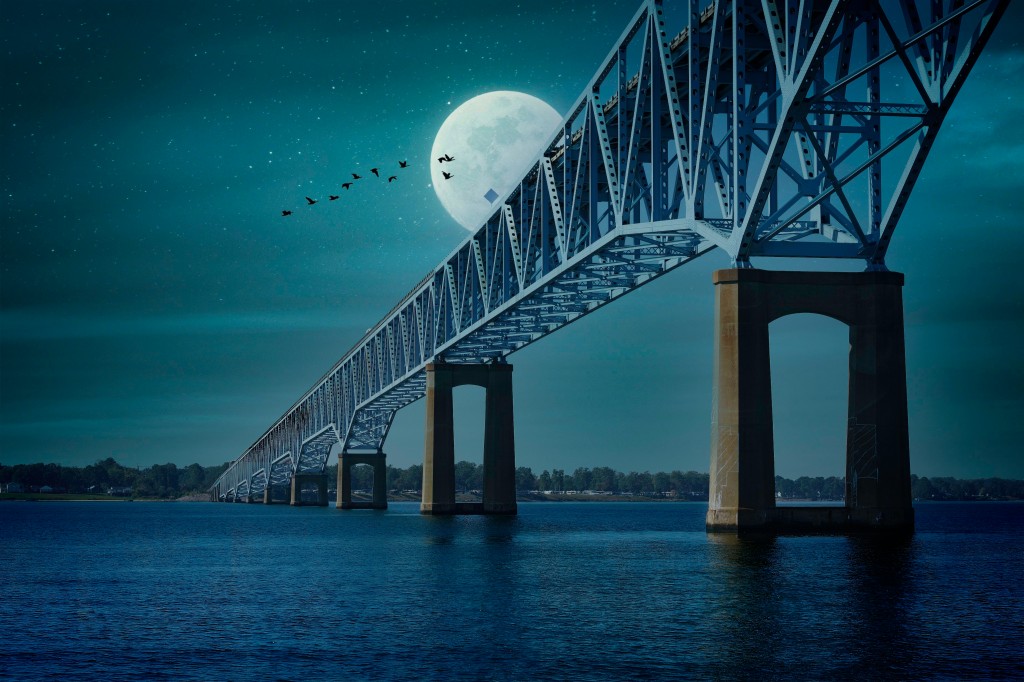
This is a special technique I have developed of using both the existing sky and a sky of choice that resides in my extensive “cloud and sky files”. Sometimes cloud files can make excellent texture files as well. One source of cloud and sky files that I have is a friend on Facebook who loves to take pictures of different clouds she sees in another part of the country. She is always posting them on her feed and with her permission, I’ve downloaded lots of her images and placed them in my cloud, sky or texture files for use at a later date. It is too true that I sometimes get some really weird looks from people when they see me just pointing my camera into the sky just to capture some of the clouds and skies that I see locally. Here are three of her “skies” I’ve used (and have) in my image files. Thank you, Jennifer H.!

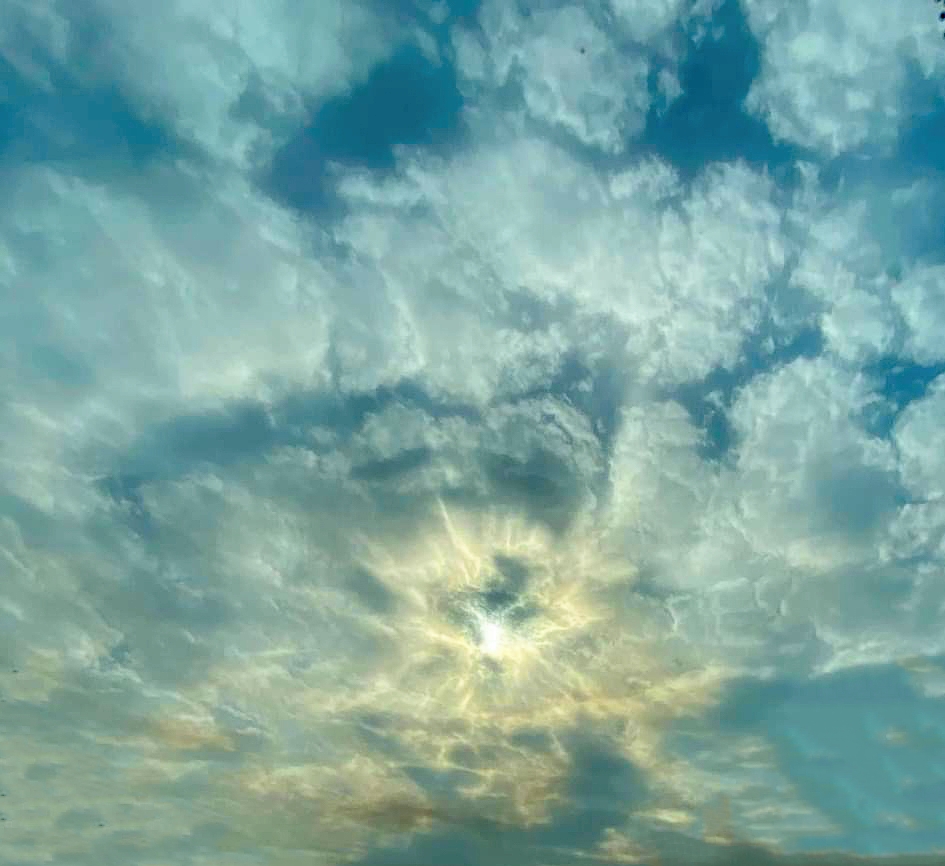
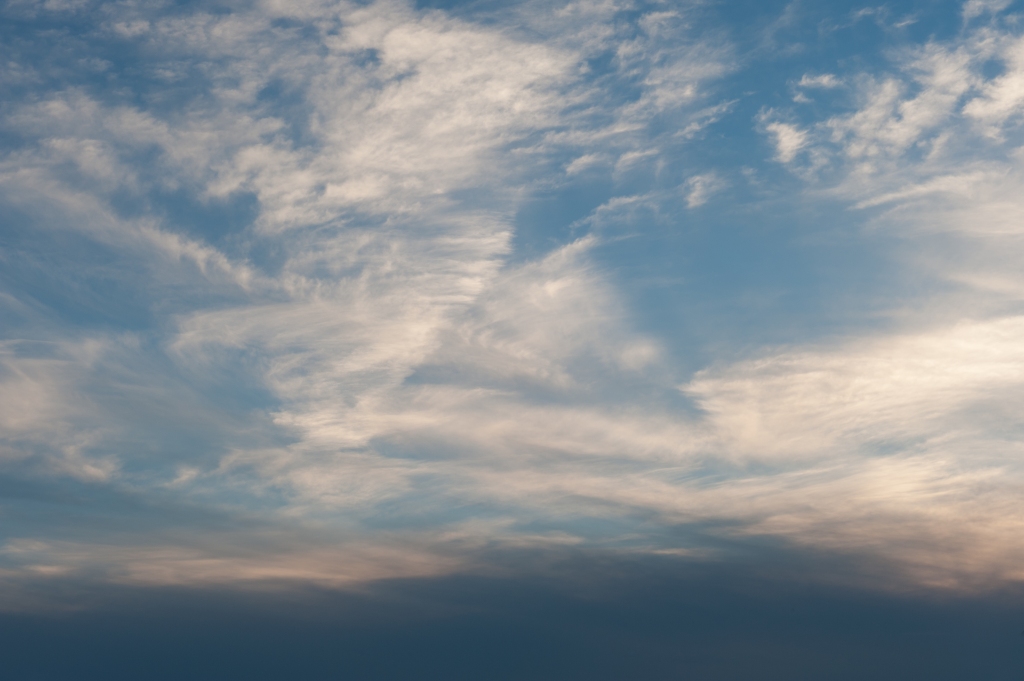
It should go without saying that it is crucial to match the “right” kind of sky with the image I am working on. This takes a lot of practice to do successfully so that the photo doesn’t turn out really “weird” looking.
The process of replacing the sky and adjusting the “look” of the water were perhaps the biggest consumers of my time on this photograph.
Other adjustments like the stern lamp sunburst (rays) and highlighting the gentle light on the boat’s woodwork only took a few minutes.
All in, and for those of you who might be interested, I believe I probably had about 45 minutes (total) invested if you also count the time for the basic adjustments I did in Lightroom.
I”ve spent a lot of days and nights out on the water and at sea . And I have seen many spectacular Sunrises, Sunsets, Moons and Heavenly Astronomical scenes. This photo perfectly captures not what I was necessarily looking at but more accurately, what I “saw” in my mind that early evening.
In the end for me, it’s all about having fun and keeping my mind healthy and active with the creative possibilities that post-processing provides. This photo is but one example and there are thousands more.
I hope you’ve gotten something out of this article and encourage you to make comments or ask any question you might have in the space provided.
Take Care and we’ll see you “on the one”.
Steven

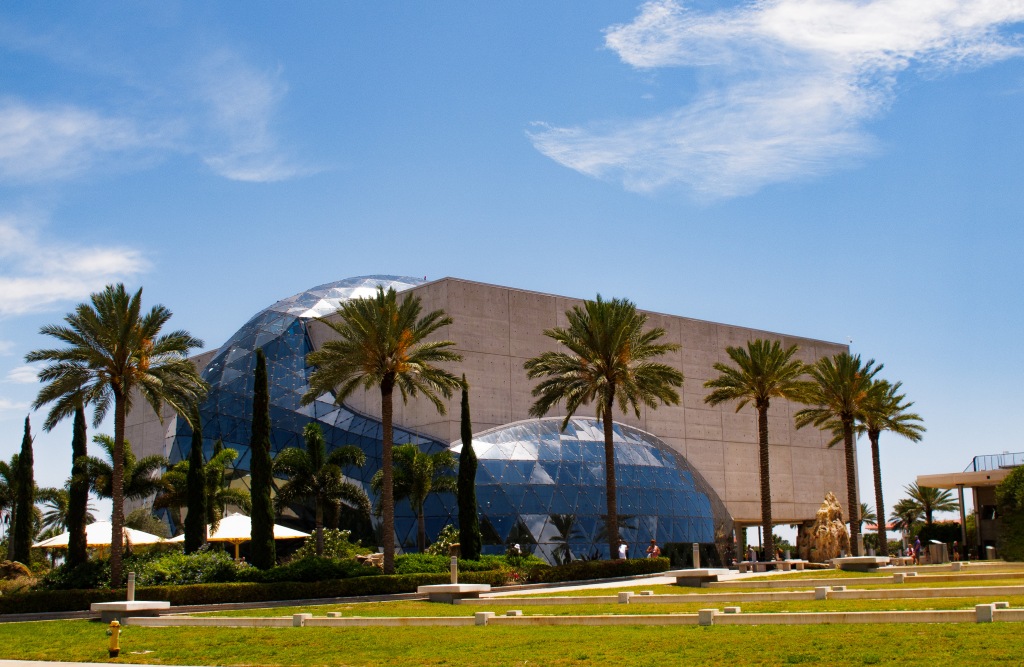
 The Dali Museum. St Petersburg, Florida 2016